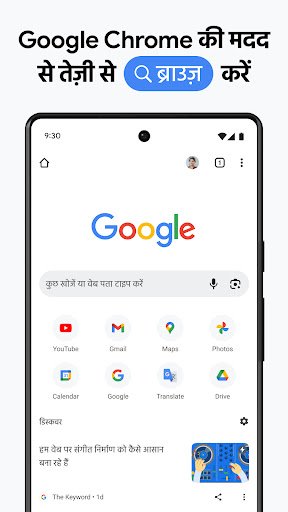
Google Chrome is a popular web browser developed by Google. Chrome is available for free on a variety of devices, including Windows, macOS, Linux, Android, and iOS. If you’re looking for a fast, secure, and easy-to-use web browser, Google Chrome is a great option.
Features of Google Chrome:
Google Chrome boasts a feature set that caters to both basic and advanced users. Here’s a deeper dive into some of its functionalities:
Browsing Experience:
- Omnibox: This multifunctional address bar acts as both a search bar and URL bar. You can type search queries, website addresses, or perform quick actions like calculations or translations directly in the Omnibox.
- Tabs: Chrome’s core for multitasking, tabs allow you to open multiple webpages within a single window. You can group tabs for better organization, pin frequently visited ones for easy access, and use the search bar to find tabs you have open.
- Media Controls: Chrome offers built-in media controls accessible through a media hub. This lets you manage audio and video playback across all your tabs, pop out videos for picture-in-picture viewing, or quickly mute noisy tabs.
Security and Privacy:
- Safe Browsing: Chrome incorporates Google’s Safe Browsing technology to warn you about malicious websites and protect you from phishing scams. It also offers real-time protection, so you’re warned even faster about potential threats.
- Password Management: Chrome has a built-in password manager that securely stores your login credentials for various websites. It can also suggest strong passwords and alert you if any of your saved passwords appear in data breaches.
- Incognito Mode: Browse privately with Incognito mode, which prevents Chrome from saving your browsing history, cookies, or site data.
Customization and Productivity:
- Extensions: Chrome offers a vast library of extensions in its web store, allowing you to add new features and functionalities to the browser. From ad blockers and grammar checkers to note-taking tools and password managers, there’s an extension for almost every need.
- Profiles: Create separate profiles for different users or purposes. This keeps your browsing data like bookmarks, history, and passwords organized and separate for each profile.
- Themes: Personalize the look and feel of Chrome with themes that change the browser’s background and color scheme. You can choose from a variety of pre-made themes or create your own custom theme.
- Sync Across Devices: Sign in to Chrome on any device (desktop, mobile, tablet) to access your bookmarks, browsing history, and saved passwords. This ensures a seamless browsing experience across all your gadgets.
Google Chrome doesn’t provide an official list of all supported languages, but it offers a vast number encompassing most major languages spoken globally.
How to Change Language in Google Chrome:
- Open Google Chrome: Launch the Chrome browser on your device.
- Access Settings: Click the three vertical dots in the top right corner to access the Chrome menu. Then, select “Settings”.
- Look for Languages: In the Settings menu, navigate to the section labeled “Languages” or “Advanced” depending on your device and Chrome version.
- Explore Available Languages: This section will display a list of languages currently supported by Chrome on your device. You can browse through the list to see if your preferred language is included.
- Add Languages (if applicable): If your language isn’t on the list, some Chrome versions allow you to add additional languages. Look for an option like “Add languages” and choose your desired language from the selection.

How to Set Hindi as the Language in Google Chrome:
On Desktop (Windows, macOS, Linux):
- Open Chrome: Launch the Google Chrome browser on your computer.
- Access Settings: Click the three vertical dots (…) in the top right corner of the Chrome window. This opens the Chrome menu.
- Go to Languages: Select “Settings” from the menu. In the Settings window, scroll down and click on “Advanced” (on some versions, you might see “Languages” directly).
- Manage Languages: Under the “Languages” section, you’ll see a list of currently enabled languages in Chrome.
- Add Hindi (if not present): If Hindi isn’t already on the list, click “Add languages”. A new window will appear displaying a list of available languages. Search for “Hindi” or browse the list until you find it. Select “Hindi” and click “Add”.
- Set Hindi as Default (optional): Once Hindi is added, you can set it as the default language for Chrome. Click the three vertical dots (…) next to “Hindi” and choose “Display Google Chrome in this language”.
- Relaunch Chrome: Close and reopen all Chrome windows for the changes to take effect. Chrome will now be displayed in Hindi.
Note: The steps might vary slightly depending on your specific Chrome version.
On Mobile (Android):
- Open Chrome: Launch the Chrome app on your Android device.
- Access Settings: Tap the three vertical dots (…) in the top right corner of the Chrome app.
- Go to Settings: Select “Settings” from the menu.
- Manage Languages: Scroll down and tap on “Languages”.
- Add Hindi (if not present): If Hindi isn’t on the list, tap “Add language”. Search for “Hindi” or browse the list until you find it. Select “Hindi” and tap “Add”.
- Reorder Languages (to set Hindi as default): Tap and hold the three vertical lines (reorder icon) next to “Hindi” and drag it to the top of the language list. This sets Hindi as the default language for Chrome.
Now, you should see Chrome’s interface and menus displayed in Hindi.
How to Use a Hindi Keyboard in Google Chrome:
There isn’t a built-in Hindi keyboard within Google Chrome itself. However, you can use Google Input Tools, a free Chrome extension, to enable typing in Hindi. Here’s how to set it up:
Using Google Input Tools:
- Open Chrome Web Store: Launch your Chrome browser and visit the Chrome Web Store [chrome web store].
- Search for Google Input Tools: In the search bar, type “Google Input Tools” and press Enter.
- Add the Extension: Click on the “Google Input Tools” extension by Google and select “Add to Chrome” to install it.
- Enable Hindi: Click on the extension icon (looks like a globe) in the top right corner of your Chrome toolbar. From the menu, select “Extension options”.
- Choose Hindi: A new tab will open with language settings. In the left-hand pane, find “Hindi” and double-click it to add it to the “Selected input tools” on the right. You can choose other languages if you wish.
- Activate Hindi Keyboard: Once Hindi is added, click on the extension icon again and select “Hindi” from the menu. This activates the Hindi keyboard.

Using the Hindi Keyboard:
Now, whenever you’re in a text box on a website, you can start typing in Hindi. Here are two main methods:
- Transliteration: Type the Hindi words phonetically in English letters. For example, typing “Namaste” will suggest the Hindi word “नमस्ते”. Use the Spacebar key to select the desired suggestion from the list that appears.
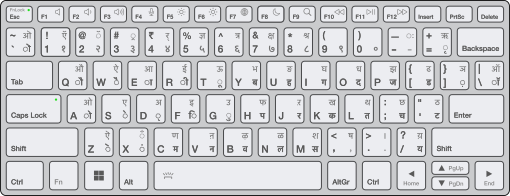
- Phonetic Keyboard Layout: If you’re familiar with the Hindi keyboard layout, you can use the on-screen keyboard that appears when you click on the extension icon. This keyboard provides the Hindi characters visually, allowing you to type directly in Hindi.
Additional Tips:
- You can switch between Hindi and other languages you’ve enabled by clicking on the extension icon and selecting the desired language.
- Google Input Tools offers various settings you can explore within the “Extension options” for customizing your typing experience.


